Waterproof Every Wet-Area Surface
A continuous waterproof membrane belongs over cement board or a foam waterproofing panel and must connect to a pan sloped 1/4 inch per foot toward the drain.
Phoenix Tile Flooring sees improper waterproofing, undersized grout joints, uneven substrates, and rushed layouts turn Phoenix shower tile into loose tiles, cracked grout, hidden rot, or a full re-tile. This guide explains how to spot those common mistakes before damage spreads beyond the tiled surface.
A continuous waterproof membrane belongs over cement board or a foam waterproofing panel and must connect to a pan sloped 1/4 inch per foot toward the drain.
Large-format tile needs grout joints of at least 1/8 inch; joints below that can crack within 1 to 3 years. Edge lippage beyond 1/32 inch creates ridges and dirt-catching grout lines.
Tile the pan and curb first, establish a level line above the pan, and center the back wall before working toward the side walls. Move cut pieces to the bottom, behind the curb, or high near the ceiling.
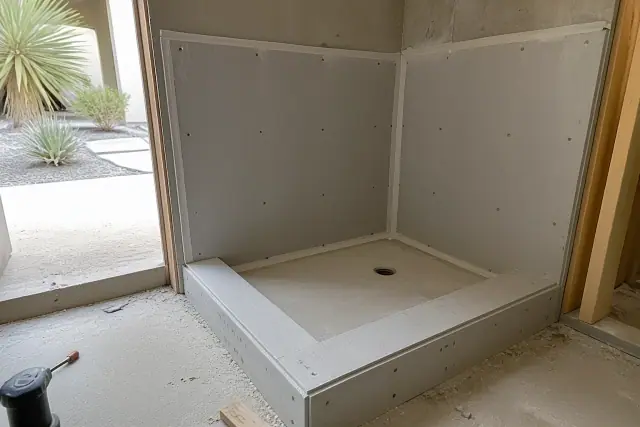
Cement board or a foam waterproofing panel covered by a continuous membrane and connected cleanly to the sloped pan.
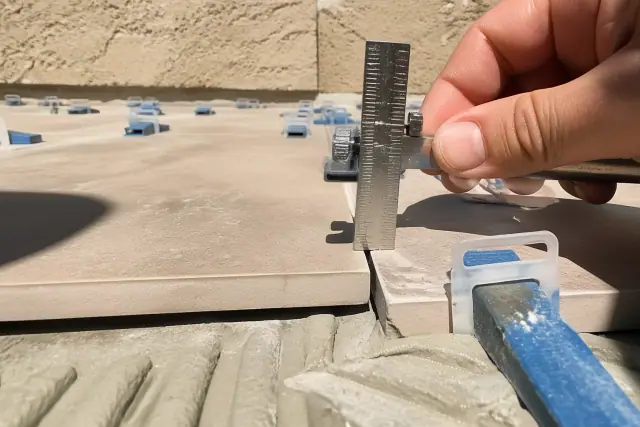
Large-format shower tile with an even 1/8-inch grout joint and neighboring edges checked against the 1/32-inch lippage limit.
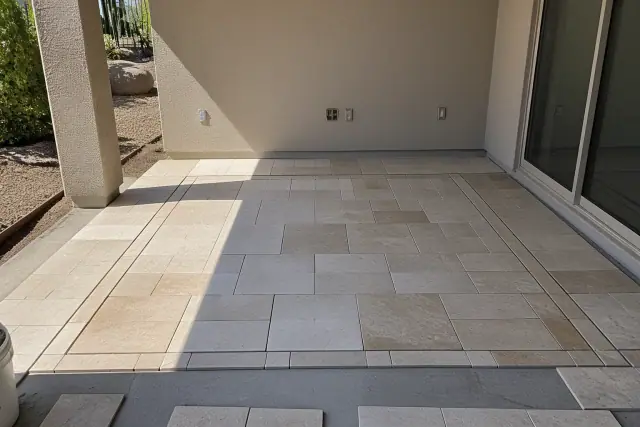
A centered back-wall pattern with floor and wall grout lines coordinated and cut pieces kept away from the main focal point.
Verify that the walls are plumb, backed by a wet-area panel, and flat to within 1/8 inch over 10 feet under ANSI A108.01.
Waterproofing continuity, pan slope, mortar selection, grout spacing, and layout all affect whether the finished shower stays bonded and drains correctly.
Act when tile loosens, grout cracks, or moisture staining appears; those symptoms can point to failure beyond the tiled surface.
Avoid greenboard in wet areas, mortar that does not match the tile size, prominent sliver cuts, and floor-to-wall grout lines that were never coordinated.
| Mistake | Likely Result | Better Approach |
|---|---|---|
| Missing waterproof membrane | Moisture can reach framing and lead to rot, mold, or loose tile. | Use a continuous membrane tied into a correctly sloped shower pan. |
| Grout joint under 1/8 inch on large-format tile | Cracking and lippage can develop within 1 to 3 years. | Plan a minimum 1/8-inch joint in line with TCNA guidance. |
| Wall flatness outside 1/8 inch over 10 feet | Hollow tiles, cracked grout, and uneven edges become more likely. | Flatten and check the substrate before setting tile. |
| Mortar not suited to the tile size | Large tile can slump or develop a poor bond. | Use large-and-heavy-tile mortar for large-format tile. |
Most shower tiling failures begin before tile is set: walls are not flat or plumb, the backer and waterproofing are incomplete, or the pan does not slope correctly toward the drain. During setting, joints that are too tight, mortar that does not suit the tile size, and uneven tile edges increase the chance of cracking, tile slump, poor bond, and dirt-catching ridges. Layout errors leave conspicuous cuts and disconnected floor and wall grout lines, making an otherwise sound installation look rushed.
Check the wall plane and waterproofing before setting a single tile. Then tile the pan and curb, snap a level line above the pan, center the back wall, and work toward the sides. Planning the floor and wall together keeps grout lines coordinated and lets cut pieces fall at the bottom, behind the curb, or high near the ceiling instead of at the focal point.
How can you spot a bad shower tile job? Check for edge ridges beyond 1/32 inch, cracking grout, loose or hollow tiles, and grout lines that do not align between the floor and wall. What belongs behind shower tile? Use cement board or a foam waterproofing panel with a continuous membrane, not greenboard. When does repair become a re-tile? If waterproofing has failed and moisture has reached the framing, the tiled assembly may need to be removed so the substrate and pan can be corrected.
Before tile is set-or when loose tile or cracked grout appears-confirm the substrate, waterproofing, pan slope, joint width, mortar choice, and layout. Share what you can see and where the problem started so a local tile professional can help define the right scope.